
By Andres Altena – Data Science Consultant
![]()
Intro
This blog is the first of a series in which we’ll be guiding you through machine learning in the cloud using SageMaker. In this blog we’re going to give you an introduction to how SageMaker works behind the scenes. For this, we recommend being familiar with the idea of containers, as SageMaker makes extensive use of Docker containers.
In future blogs, we’ll dive deeper into exactly how to use SageMaker, providing guided examples and case studies. But for now, let’s make sure we understand what SageMaker is doing behind the scenes as you train and deploy models.
What is SageMaker?
If you’re reading this blog, chances are you already know what SageMaker is. But let’s make sure we’re all on the same page: SageMaker is AWS’ Machine Learning platform. SageMaker simplifies the entire machine learning lifecycle in the cloud – from early-stage exploratory data analysis, through the training of models, deployment, and post-deployment monitoring.
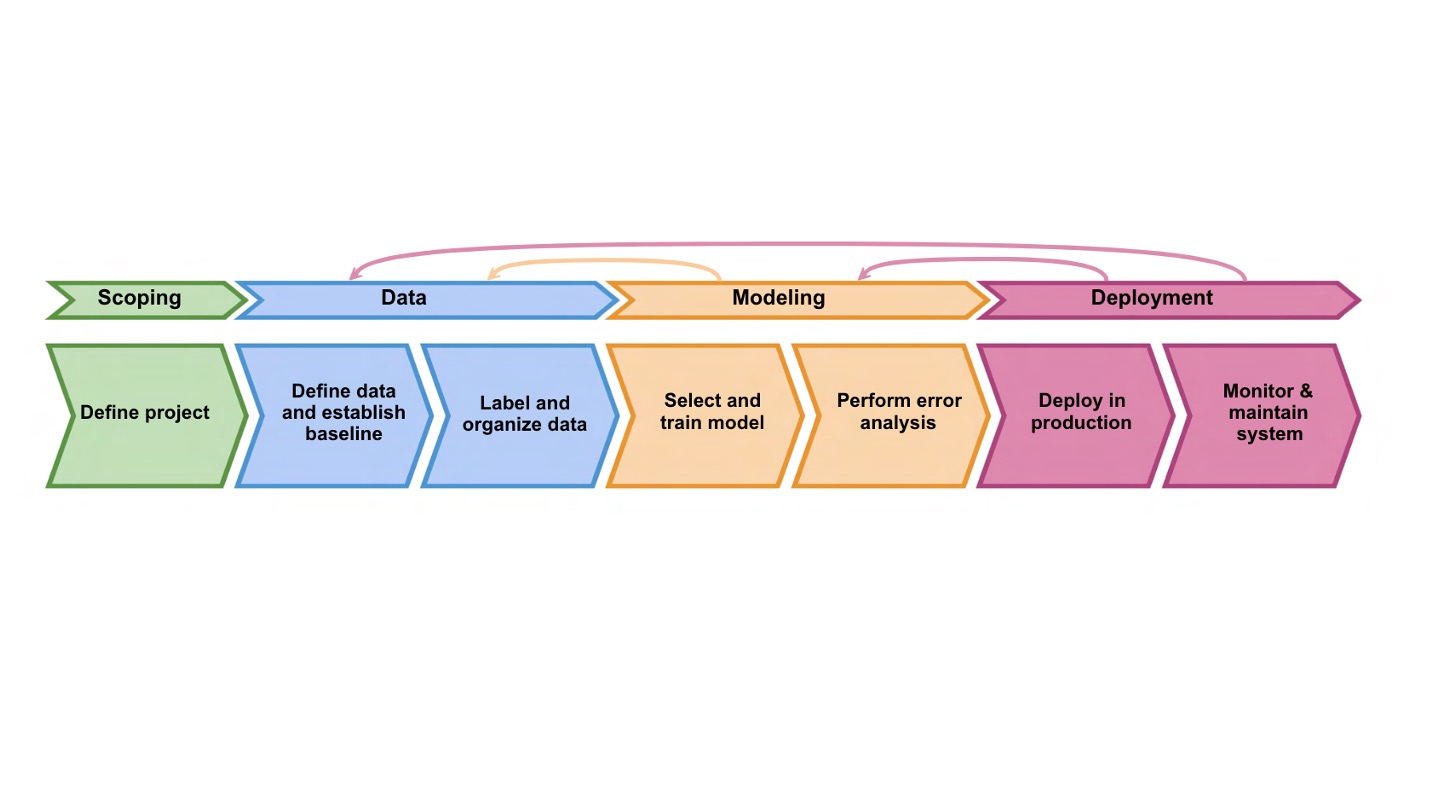
Source: DeepLearning.ai – The Machine Learning Lifecycle.
In this blog we’re interested in the Modelling and Deployment part of the lifecycle – in particular, we’ll be looking at how SageMaker uses Docker containers in the training and deployment of models.
Containers in SageMaker
What are containers, images, and registries?
![]()
“A container is a standard unit of software that packages up code and all its dependencies so the application runs quickly and reliably from one computing environment to another.” – Docker.com
A Docker container is a unit of software containing code and all its dependencies such that it will run regardless of the user’s environment – eliminating the “it was working on my computer” problem.
A Docker image acts as a set of instructions to build a container – think of it as a template for your containers.
And finally, a container registry is to containers what GitHub is to code. Container registries (like Amazon’s Elastic Container Registry ECR ) store container images which can be made public, shared for collaboration or kept private.
Ok, but why is this relevant to SageMaker?
Docker containers are central to how models are trained and deployed in SageMaker. Every model you train or deploy in SageMaker has been containerised and saved as a Docker image in ECR.
This image contains all the code required to train your model, make predictions, and deploy the model – as well as containing all the dependencies. Technically you can have separate containers for training and deployment, but that’s a topic for another blog. During training and deployment, these images are run to create a container with a functional model. Let’s have a look at that process in more detail.
What happens when you train or deploy a model?
The following figure provides a summary of the training and deployment of models. If it looks a bit daunting, don’t worry we’ll take you through this step by step.
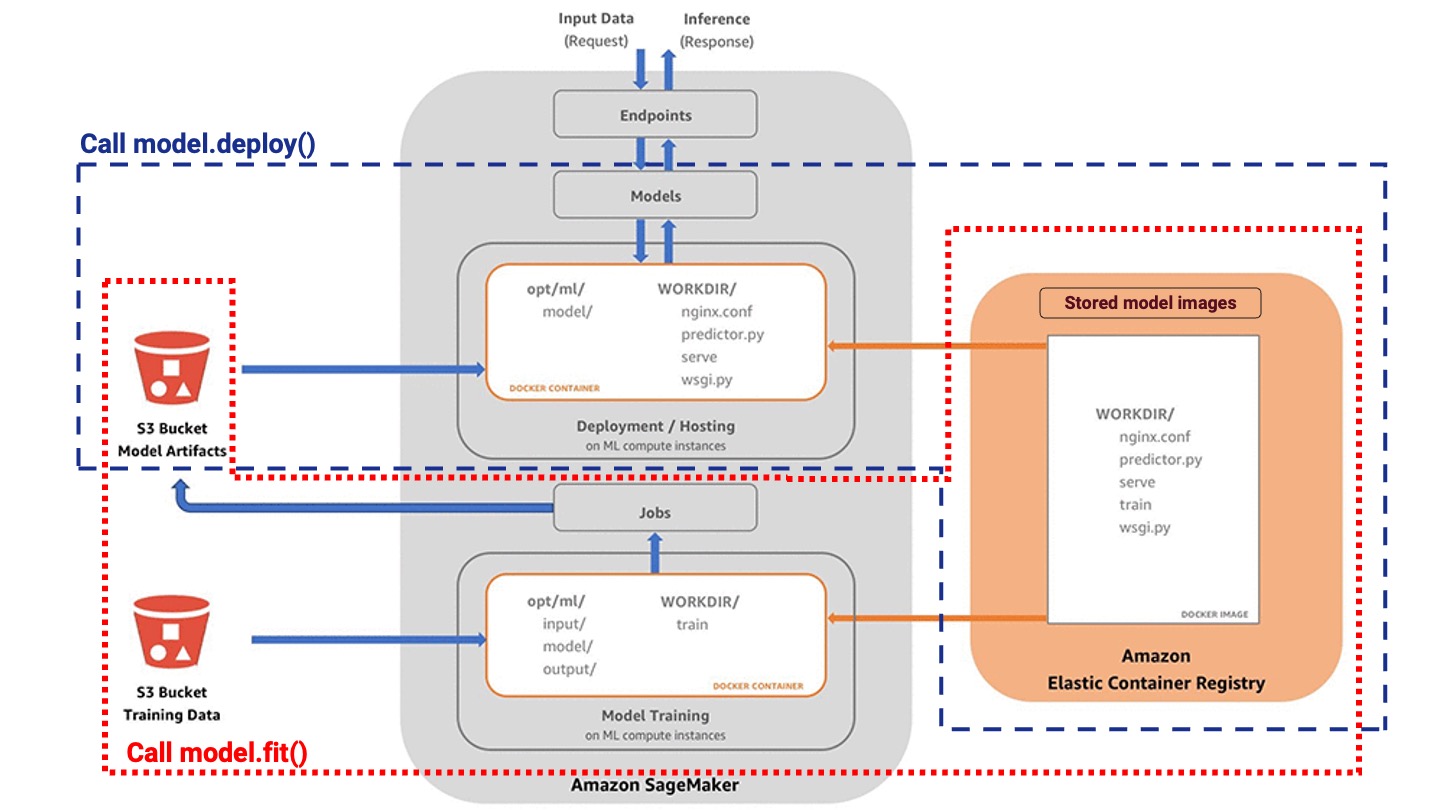
Source: https://sagemaker-workshop.com/custom/containers.html
Notice we’ve divided the figure using two bounding boxes: the red box highlights the training process, while the blue box shows the deployment process. Let’s focus on these separately:
Training
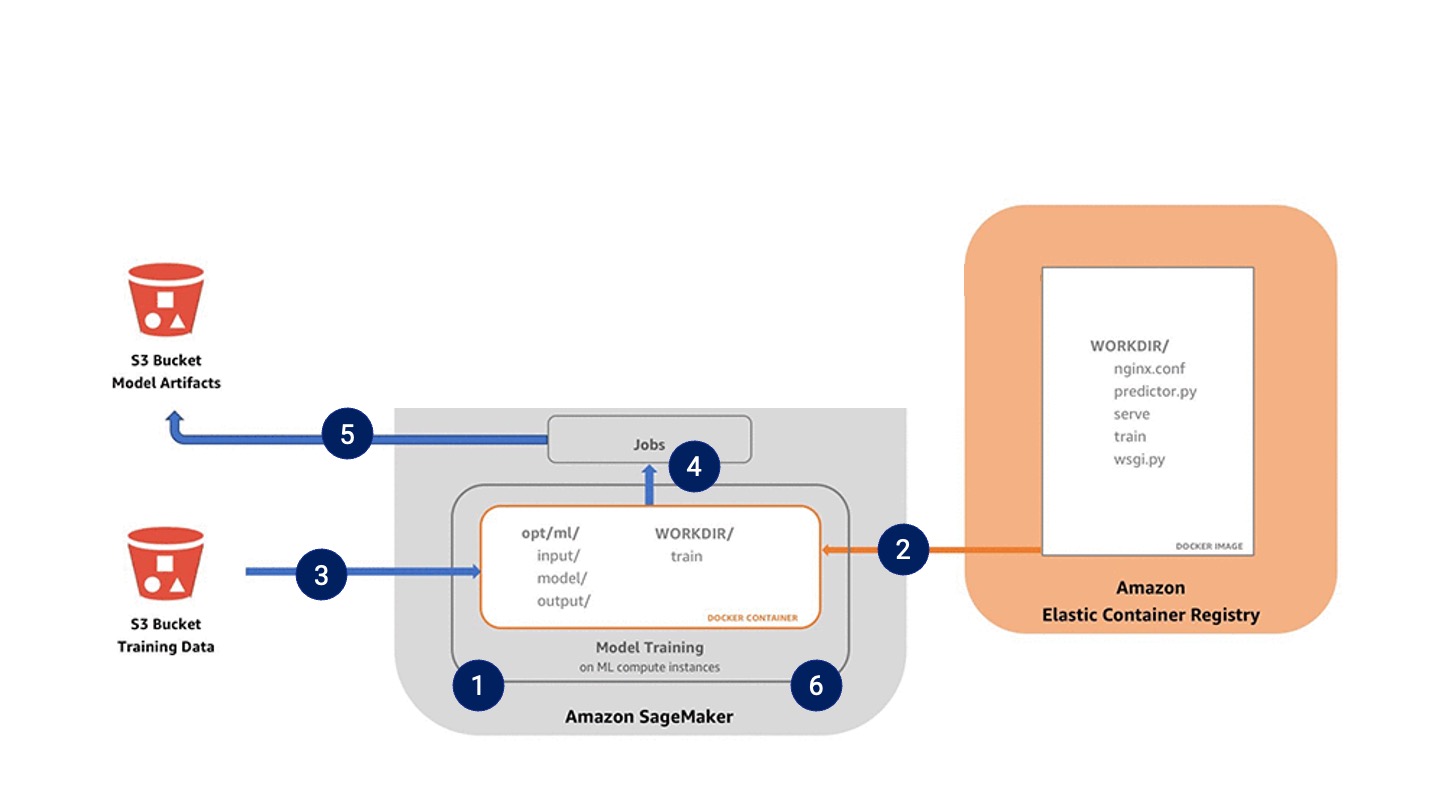
For training, SageMaker needs to receive the following information:
- The location of the training data in S3
- The location of the model in ECR
- Information on the size and number of EC2 instances to use
- Where do you want your model artefacts to store in S3
The training process is as follows:
- SageMaker launches the specified EC2 instances,
- SageMaker builds the image into a container running on these instances,
- The training data is imported from S3 and stored within the “
opt/ml/input/data/<channel_name>” directory (<channel_name will be training, eval, or test), - The container is now set up, so it runs the training script,
- The model artefacts are stored in “opt/ml/model” and then export out to S3,
- The EC2 instances spin down as training is now complete. You only pay for the time spent training the model.
Congratulations! Your model is now trained. But this does not mean it’s ready to make predictions. In fact, the EC2 instances have now gone down – all you have are some files stored in S3 and a Docker image in ECR. It’s now time to deploy your model.
Deployment
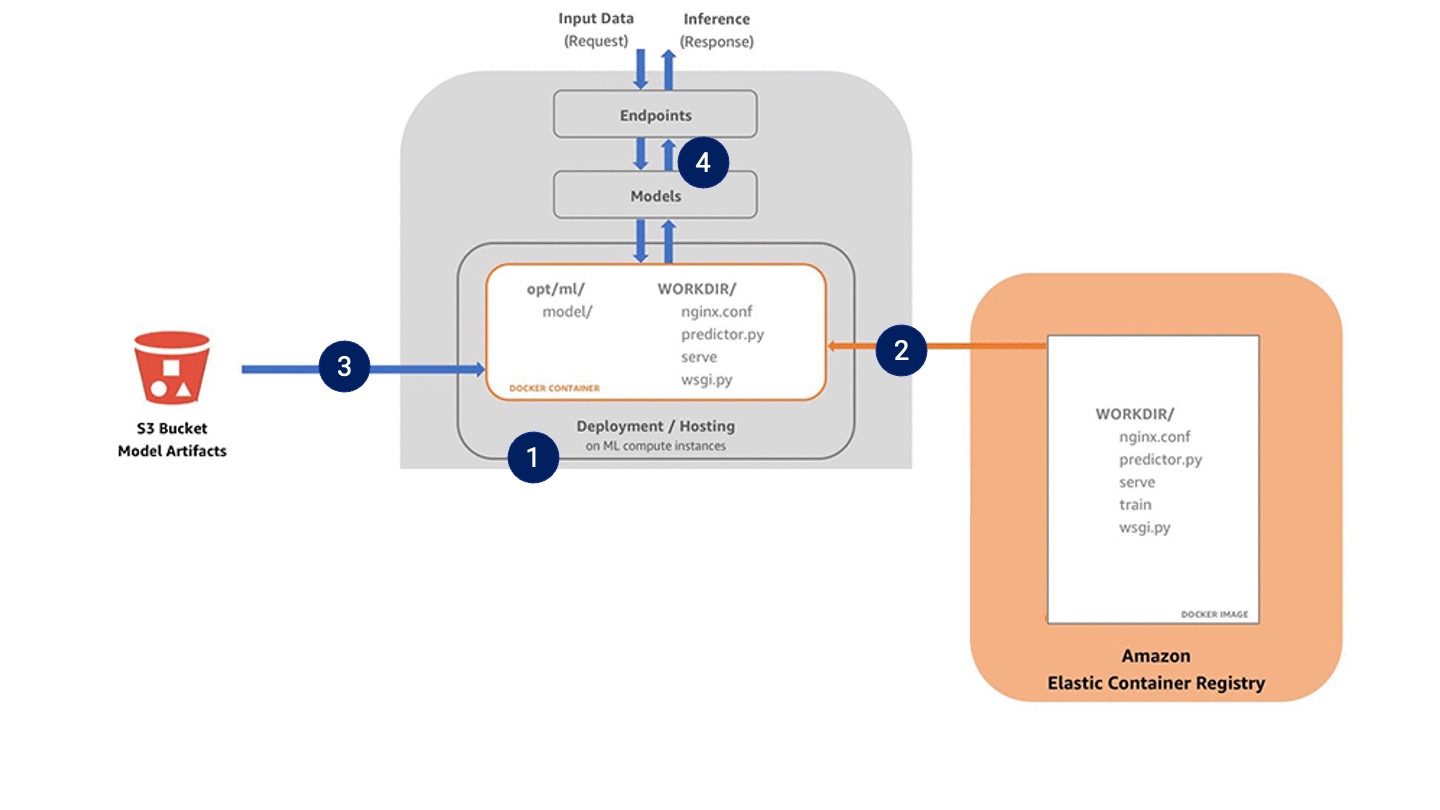
For deployment, SageMaker needs to receive the following information:
- The location of the model artefacts in S3
- The location of the model in ECR
- Information on the size and number of EC2 instances to use
The deployment process is as follows:
- SageMaker launches the specified EC2 instances,
- SageMaker builds the image into a container running on these instances,
- The model artefacts are imported from S3 and stored in “
opt/ml/model”, - Docker now runs the serve script, which means your model is ready to receive requests!
And that’s it! Your model is ready and will return the results to any requests.
There is one last thing to cover, inference endpoints vs batch transforms. These are the two ways in which you can send requests to your model.
For inference endpoints, you’ve deployed your model and it is live and awaiting requests. This is necessary when you want near real-time predictions, but it comes with a cost – your EC2 instance will continue running until you tell it to stop, so make sure you keep an eye out in Cost Explorer and set some budget alerts!
Batch transforms, as their name would suggest, transforms a batch of data all at once. This means your model is not technically deploying whilst waiting for requests, but you simply make one request to transform a large amount of data. The EC2 instance then spins up, performs the transform, and then spins back down. This is significantly cheaper and the way to go if near real-time predictions are not necessary.
Coming Soon
In this series we’ll walk through how to use SageMaker as a whole, focusing on case studies and providing guided examples on how to develop different models – focusing on the entire ML lifecycle.
Want to know more and cannot wait for the next instalment? Get in touch with us here.